Start outside before anything else
Walk around the outside of the house and photograph the roof from every angle. Get wide shots of the full roof for context, then move in closer on specific damaged areas. Do every slope, not just the ones with obvious damage. Adjusters notice when photos are selective. A comprehensive set looks more credible than a handful of close-ups.
If you can safely use a ladder to get a closer look at damaged sections, do it. But don't go up if the surface is wet or if you're not confident on a roof. Ground-level photos with your phone's zoom still show plenty.
Hail damage shows as circular dents or bruising, often with lost granule coating. Wind damage typically lifts or tears shingles. Both look different and are documented differently.
Get close enough to show the actual damage
Wide shots establish context. Close shots establish damage. You want both. Use your phone's optical zoom rather than digital zoom if possible, since digital zoom degrades the image quality. Get close enough that individual shingles are readable in the frame.
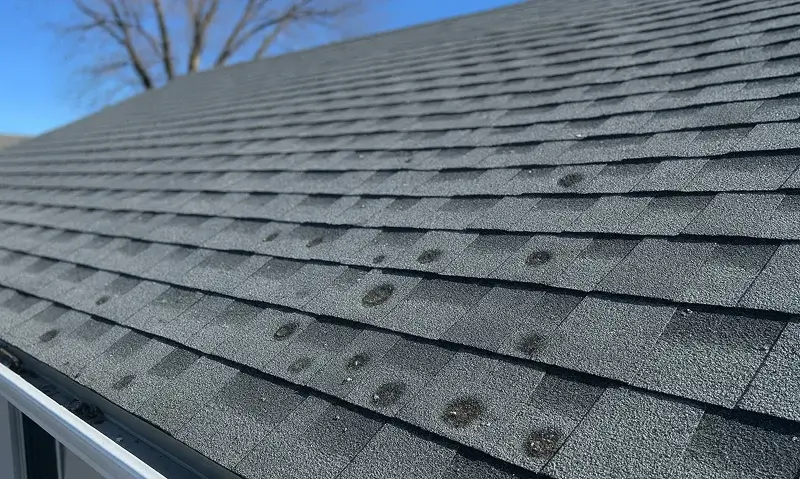
Hail damage shows as circular dents, bruising, or loss of granule coating, often with a soft spot underneath. Soft spots sometimes aren't visible but can be felt.
Wind damage shows as lifted shingles, torn edges, missing sections, or shingles that have cracked along the grain.
Tree or branch impact shows as indentations, punctures, or broken shingles in a concentrated area. Document the full extent of the impact zone.
Go into the attic
This is the step most homeowners skip, but attic photos are often the most useful documentation you have. Water stains on the underside of roof decking, wet insulation, daylight visible through gaps in the roof, tracking along rafters. All of this is evidence of where damage is actually allowing water to get through. Bring a flashlight and photograph with your phone's flash on.
Document the inside damage too
Water stains on ceilings, warped drywall, discoloration on walls, any damaged belongings near the leak point. All of it gets documented with photos. Note in writing when you first noticed each area of damage and what you observed.
Photograph the date. Most phones embed the date in photo metadata automatically, but a visible reference adds certainty. Take a photo of that day's date on your phone screen, or a note with the date written on it, and include it at the start of your photo sequence. Adjusters appreciate clear timestamps.
Keep a written record alongside your photos
Photos are stronger when paired with written notes. Write down the date the storm occurred, when you first noticed the damage, what the visible weather conditions were, and whether there was a named storm or local weather event. Check weather.gov or a local news source for records, then save or screenshot those. External references help establish that the damage was caused by a specific event rather than gradual wear.
Do not make repairs before the adjuster visits
Any repair that covers up damage before the adjuster sees it is a reimbursement you won't collect. If the damage is serious enough that you need to protect the roof immediately, document everything thoroughly first. Then put up a tarp or do what you need to do to prevent further damage. Never repair and then try to claim.
How to organize and deliver your photos
Create a shared folder or album with everything in it, sorted chronologically. Don't filter to only the most dramatic shots. A full, organized set is more credible than cherry-picked photos. When you speak with your adjuster, you can walk them through it section by section rather than hunting through your camera roll.
Having a licensed contractor present during the adjuster visit is also worth considering. A contractor who works with insurance claims regularly can point out damage the adjuster might pass over, use the right technical language, and document the full repair scope. Ralph can connect you with someone who handles this regularly.